
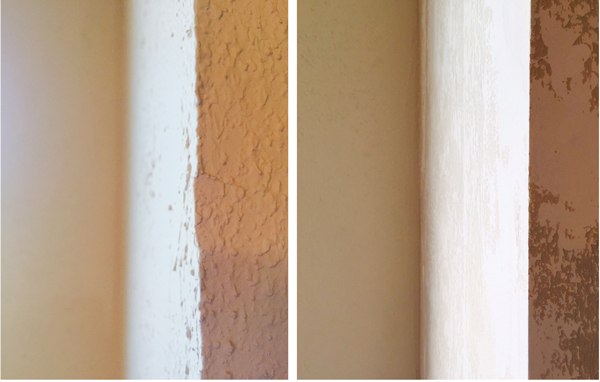
So, I thought I would start out with an image. What you see here is six different wall textures. Nothing wrong with that, right? Right. If these pictures were taken in six different rooms…
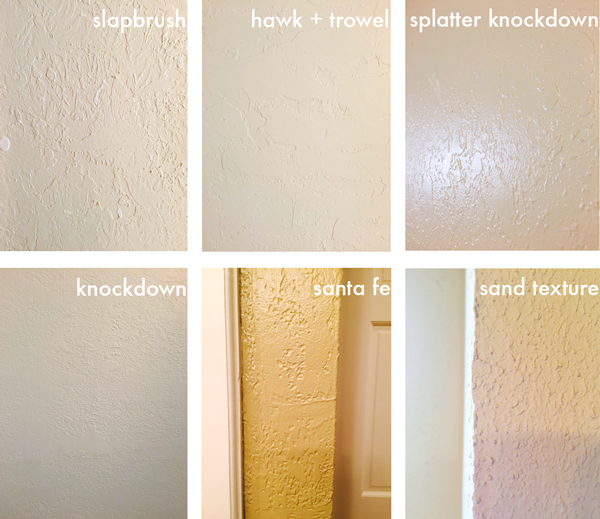
But they were taken in two. In my house. TWO? How is it that two rooms can have this many textures? (These rooms only have four walls, by the way.) Well, it’s possible. And I’m on a mission to fix it (i.e.: turn six textures into one).
There two commonly used methods to get rid of heavy texture:
1) You can tear out the existing dry wall and replace it with new dry wall panels, and then add texture.
2) You can skim coat, or float, the wall on top of the existing texture. This option is cheaper than replacing the drywall, but super tedious, exhausting, and requires mad skills. Sawdust Girl has a great tutorial for how to skim coat your walls, if you’re interested in DIY’ing it.
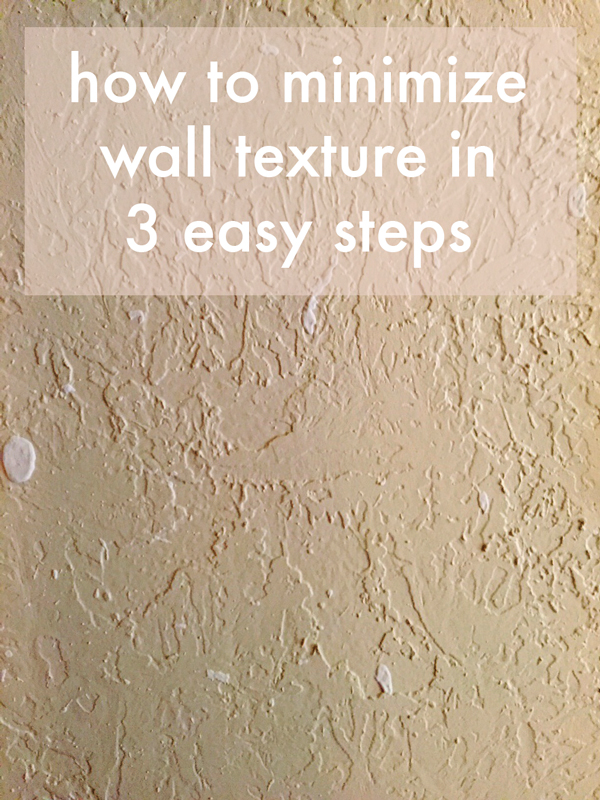
This is where my third method comes in… it minimizes existing texture and can be achieved in three easy steps. I have found this to be a totally doable and inexpensive option, and is a good compromise between living with wall texture you hate, and having a perfectly smooth wall (which to obtain would require doing one of the two pricier methods listed above).
For option number three, you will need the following supplies:
+ An Orbital Sander (I have this one from Ryobi, but there are a lot of other great brands out there like Bosch or Dewalt). Regardless of which brand you go with, I recommend getting a corded sander with a 5″ or 6″ sanding radius. I’ve found that going any smaller will double your work, and any larger will making sanding corners and tiny spaces difficult.
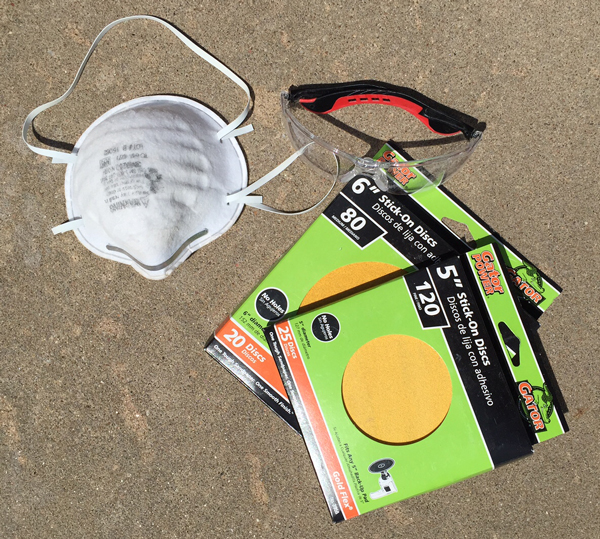
+ Protective Eyewear (trust me on this one). These run super cheap at Home Depot (like $5-10 dollars a pair) and are well worth the cost.
+ Sanding Pads – You’ll want to make sure you buy the right pads for your sander (some require velcro pads with holes, while others call for stick-on pads without holes.) I decided to go with 80 grit and 120 grit pads. The lower the grit number, the more abrasive the sand will be. So for sanding super heavy wall texture, I would recommend using a 60 or 80 grit, and finishing off with a 120 gritt for a softer hand.
+ A Dust Mask or Respirator – You can find these at any supply store (I bought these) for pretty cheap. And if you treat them well, they may last you through another project).
+ Lint-Free Dust-Cleaning Cloths – Here’s a brand I like (I use it on my car. Plus, they’re washable). You can always use a rag, but you run the risk of leaving fibers behind that might get stuck in the paint.
+ A Step Ladder
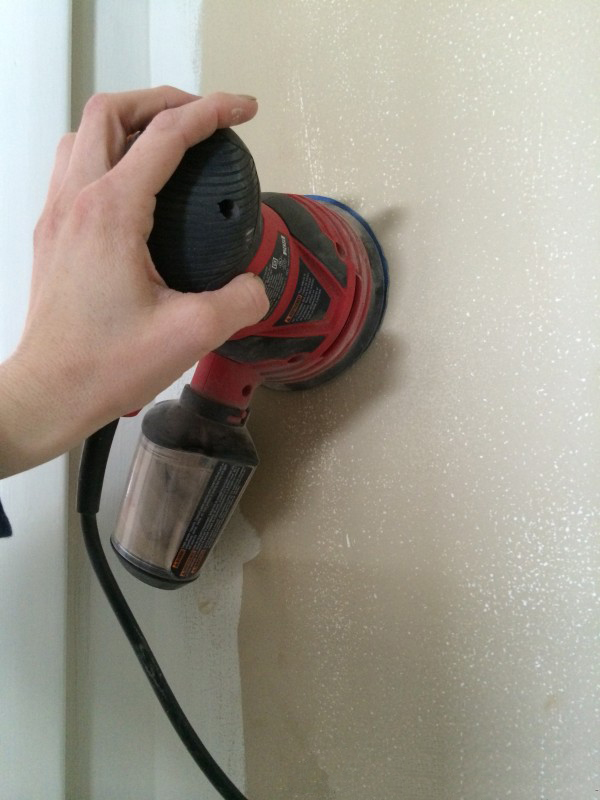
Step 1: Sand the wall (start with the 60 or 80 grit). Yup, it really is that simple. The orbital function on the sander will help guide your hand as your start sanding. I recommend using a circular motion (rather than a side to side motion) for a more even sand. If you’re scared to start, find an inconspicuous test area and have at it.
When and if you start to see drywall peeking through, stop. You’ve gone too far, and it’s probably time to move on to another area. The goal is not to get the walls perfectly flat (because that would require skim-coating, or replacing the drywall). The goal is to minimize the heavy texture as much as possible.
**Something to keep in mind: this is really the only step in this process, and it takes time. I started on a wall with a medium to heavy texture, and it took me an hour to sand a 4′ x 2′ area. So don’t get discouraged, and take lots of breaks (I do).
Step 2: This step is totally optional and based on personal preference. If you’ve finished step 1 and desire an even smoother finish, replace your 60 or 80 grit pad with a 120 grit and run the sander over the desired area. You will not need to spend as much time on this step as you did on the first, since step one accomplished most of the dirty work.

Step 3: (I recommend waiting until you’ve finished all of your sanding to start this step) Take your lint-free dust-cleaning cloth or rag, and dampen it with a little bit of water. Run the rag all over the sanded areas, removing any residual dust or fibers. You may need to do this several times over the same area to get it completely clean. You have now prepped your wall, and you are ready to paint.
So, are you guys feeling inspired to tackle an ugly textured wall? You know you have my vote of confidence.
P.S., If you’re interested in checking out my other reno DIY’s, you can find them here. And if you’re just joining us here, you can follow along as we renovate our new-to-us-home here!