
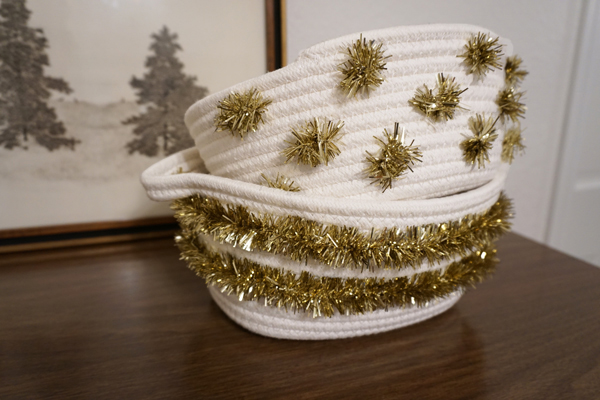
Who says tinsel is just for the holidays? I certainly don’t! I put tinsel garland in the same category as streamers, confetti, and balloons. In fact, I decorate with it year-round. So, it wasn’t too much of a stretch for me to find another use for this perennial favorite.
Lately, we’ve seen attractive storage baskets being used everywhere- from entryway tables (to store keys and mail), to nurseries (to house diapers and toys), to bedrooms (to contain throw pillows and blankets). And if you don’t know what I’m talking about, a quick Pinterest search will prove my point. So, here are two tinsel-spins on a cotton rope storage basket. Enjoy!
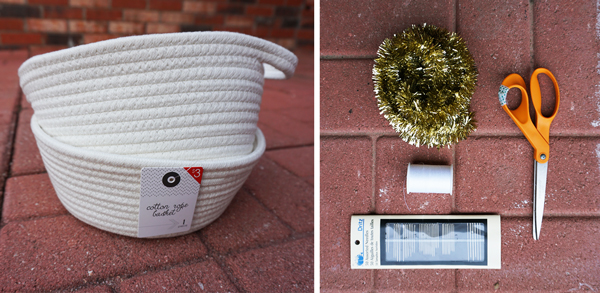
To make these DIY tinsel storage baskets, you will need the following 5 supplies:
+ Rope Storage Basket – I bought mine from the dollar spot at Target for $3 bucks each, but I’ve listed more options below at the bottom of this post.
+ Metallic Tinsel Garland – Also bought this Target around Christmastime, but you can find similar on Amazon and Etsy (here and here). Wherever you end up buying it, make sure you buy garland with a 1″ width (yes, garland comes in various widths). But alas, if you can’t find 1″, you can always trim the sides to create the width you want.
+ Scissors
+ White Sewing Thread
+ Sewing Needle
To make the striped tinsel basket –
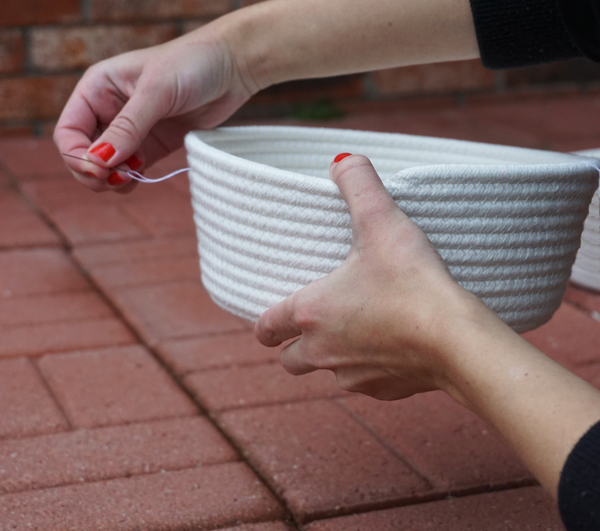
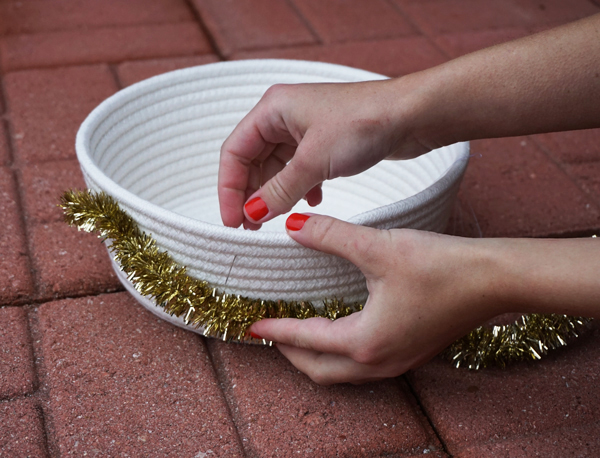
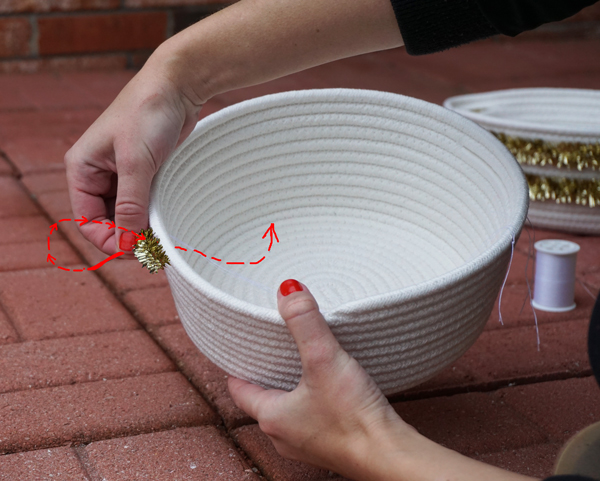
Step 1: String the needle with the sewing thread, and knot it at one end. Thread the needle through the basket, starting from the inside out.
Alternative method: If sewing is not your thing, not to worry! You can follow these same steps, but substitute the sewing part with a hot glue gun and glue sticks!
Step 2: Position one end of the tinsel garland in place. Bring the head of the needle around the garland and back through the rope basket. This will secure your garland to the basket. Your needle should now be on the inside of the basket.
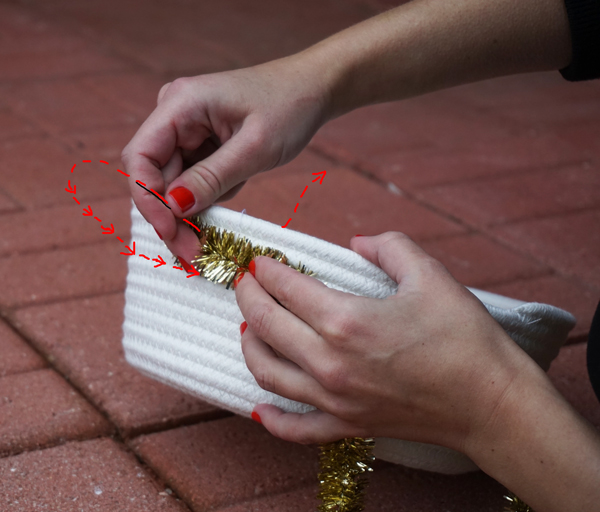
Tip: Pick a spot inbetween the strands of rope, and let that be your guide as you work your way around the basket. This will ensure that you have a straight line all the way around!
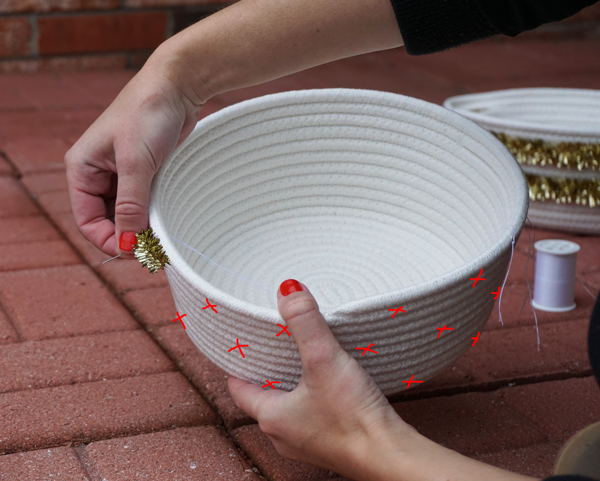
Step 3: Pick a spot a couple of inches over from the last place you threaded the needle, and repeat step 2, threading the needle from the inside of the basket to the outside, and then around the garland. Do this until you have worked your way all the way around the basket.
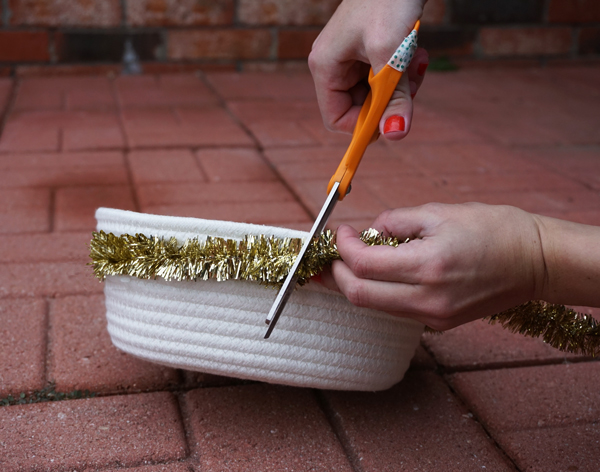
Step 4: When you’ve reached the other end of your garland, cut the strand of tinsel, and secure the end of it to the basket with the needle and thread. Finish by knotting the end of the thread on the inside of the basket.
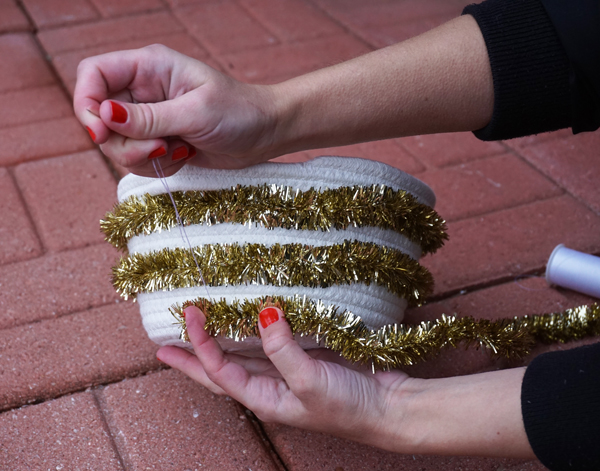
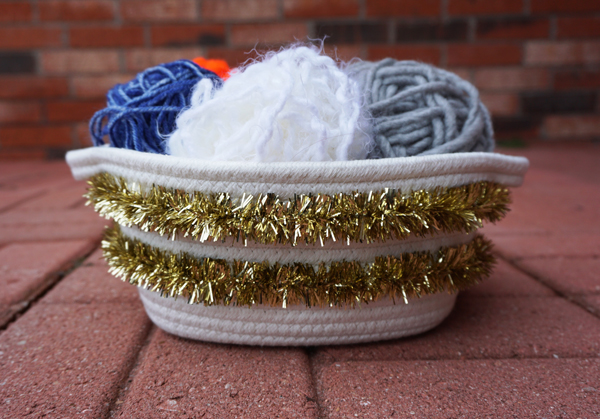
Step 5: Now you can begin your next layer! Repeat steps 1-4 until you’ve achieved the amount of “stripes” you desire. And there you go! You have your striped tinsel storage basket!
To make the tinsel polka dot basket –
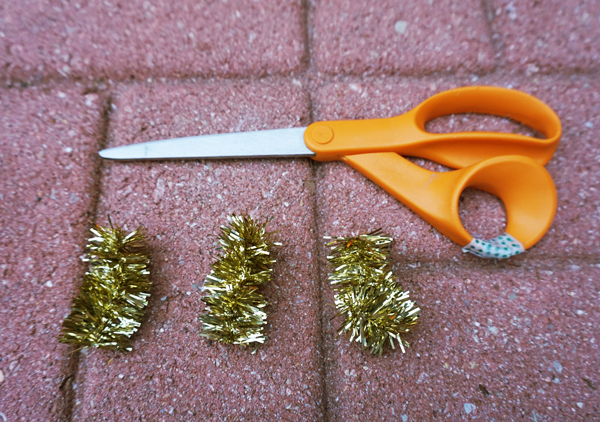
Step 1: Cut the tinsel garland into 1″ pieces. Cut as many pieces as you will need to create a staggered polka-dot pattern all the way around the basket. The number of pieces will depend upon how far apart you space the “polka dots.”

Step 2: String the needle with the sewing thread, and knot it at one end. Thread the needle through the basket, starting from the inside out.
Step 3: Position one of your 1″ tinsel pieces in place, and thread the head of the needle around the tinsel piece and back through the rope basket to secure the piece in place.
Step 4: Continue steps 2-3, placing your remaining tinsel pieces in a staggered polka dot pattern, like I have illustrated above. Knot the end of your thread on the inside of the basket when you are finished creating your pattern. You’re done!
Rope Basket Options: